S3 as a cloud storage
This article is a bit older and might be outdated.
Using AWS S3 as a static data resource for a modern PHP App
Learn why to use a cloud storage for your Apps static files and how to set up and use AWS S3 (with IAM). Additionaly we'll show an PHP example on how to upload files from your App to S3 with flysystem.
Why bother anyways?
Everybody is talking about remote file systems lately. What the hack? Your simple web server based persistent storage did the trick all those years. PHP files are stored together with everything else — runtime data such as user uploads and static assets. Nice and easy. Why master yet another technology? Why separate code from other data? First off, it's better:
- Separated: A cloud storage mitigates the load on your application engine by separating static and dynamic requests.
- Scalable: A cloud storage allows your dataset to grow and grow and grow.
- Affordable: A cloud storage probably cheaper than you might think: You pay for your actual usage. With "classic" storage, you buy a volume of a finite size and pay for it, however much you might use of it.
- Flexible: Data is usually the main reason why migrations are hard. Using a cloud storage from the start allows you to switch your engine (aka PHP runtime), without bothering about the data since it just stays where it is.
- CDN-ready Having a cloud storage in place makes it easy to go the next step: implementing a Content Delivery Network - allowing even faster delivery of your application all around the world.
- Clean: It reduces complexity by implementing the single responsibility principle.
You also probably need to care. We have just released our New Apps BETA. And like with other cloud providers the App storage now is "ephemeral". That means, it get's cleaned every time you deploy. You deploy with Git and you don't want to mess up your Git anyways.
We are currently planning an own cloud storage solution, tightly integrated and easy to use. Until then you can:
Use AWS S3
Simple Storage Service - or simply S3 - is part of Amazon Web Service - or simply AWS (OMG!). It's probably the most widely used cloud storage there is. It allows you to grow virtually limitless in size as well as requests/visistors. It's highly redundant and has a superb track record of availability and stability. The downside is the hard to calculate the costs and the complexity.
The first thing you should now about the pricing: Don't bother about it in the beginning. If your data amount is below 10GB and you get less than a million visits per day, chances are that you end up below $10 per month. Especially while you are developing, and don't have much traffic besides your own requests, you might not even pay a few cents.
Setup
Let us guide you through it. This article will help you to:
- Sign up for an AWS account
- Create you first S3 bucket storage container — name space for your files
- Set up proper permissions — safe access with additional credentials
Note: When you first create an AWS account, there are a lot of "Get Started" and some-such links all over the place. The following guide does not mention them. Just click them away (or read them and then click them away).
Create the AWS account
If you don't already have one: Just go to http://aws.amazon.com/, click on "Sign Up" and follow the on-screen instructions.
Create your bucket
After the sign-up, you should be logged in to the AWS console - their web based dashboard. Click on services at the top, find and click on S3.
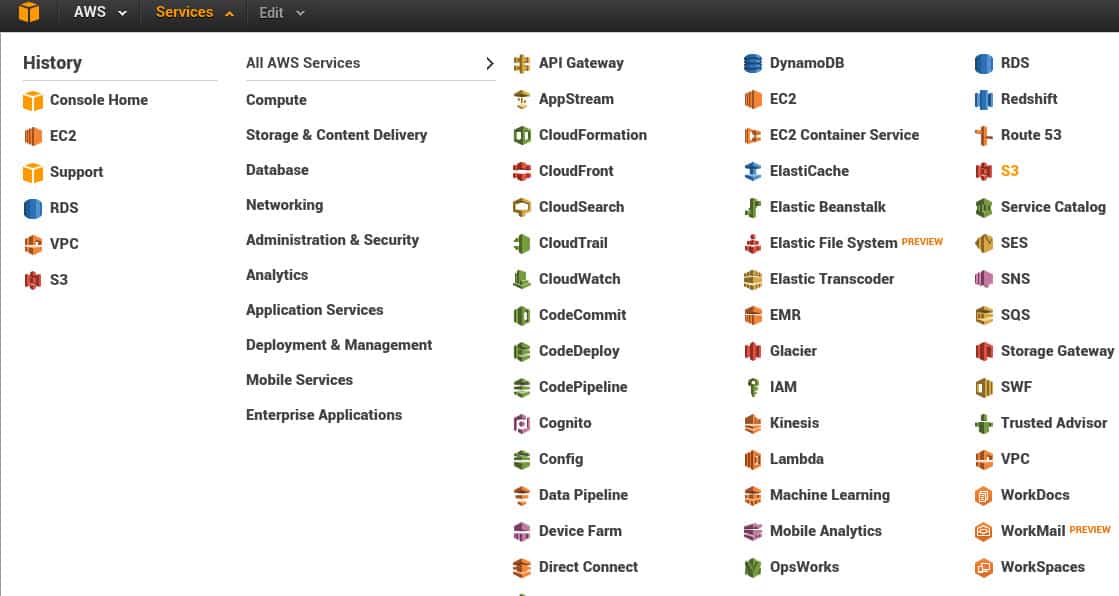
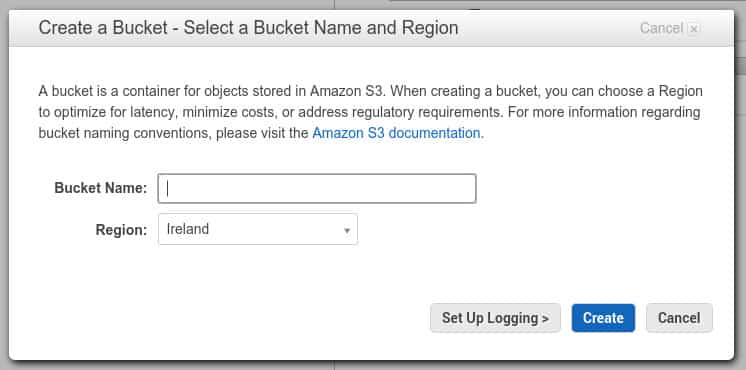
Now you are in the S3 console. Click on "Create Bucket". This will present you with a create dialog, in which you must decide a name and a region. Read on carefully:
- The Bucket Name can be anything, unless it's already in use. If you choose a name in the form
sub.domain.tld, egfiles.mydomain.com, then you can later on route a subdomain (of the same name) to that bucket. If you don't, it's not a biggy either: You can use another AWS Service (CloudFront) later on to route arbitrary (sub)domains to your S3 buckets. Keep it simple for now. - The Region should be chosen wisely. If you are using any App with fortrabbit, you want to choose Ireland here - even if you yourself are located in the US or anywhere else.
Then just click "Create" and don't bother with logging right now.
Configure the bucket
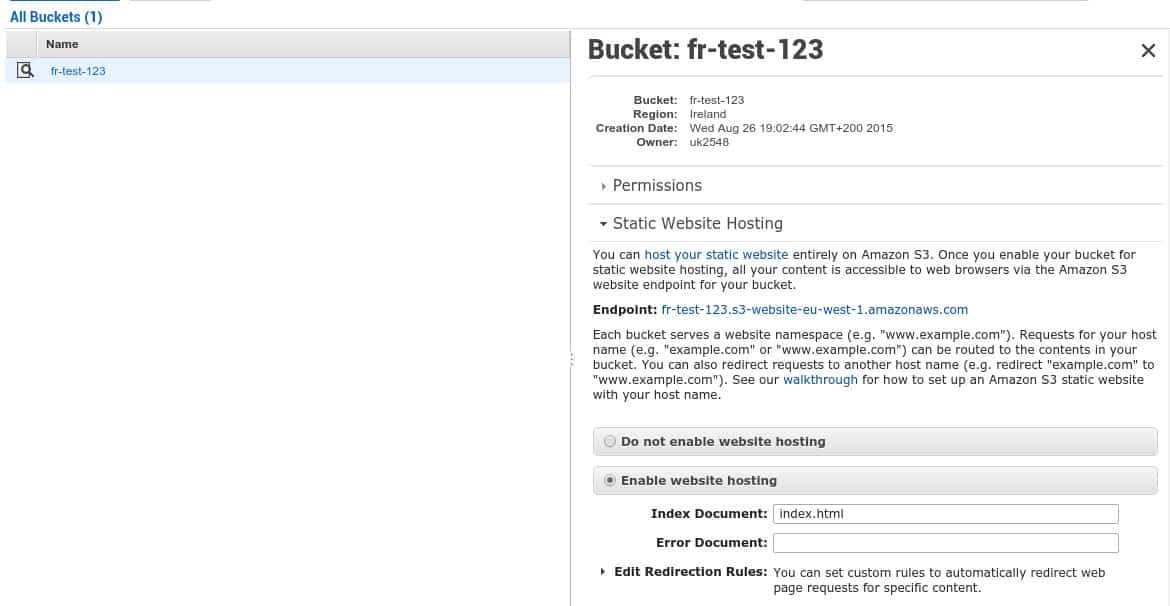
Now that the bucket is setup it should show up in your bucket list. Click on the magnifier icon left to the name. You should now see the "Properties" tab on the right side. Open the "Static Website Hosting" sub-tab.
Mind and remember the "Endpoint", which should look like your-bucket-name.s3-website-eu-west-1.amazonaws.com. You'll need that later.
Since this article is about hosting static contents: toggle "Enable website hosting". You must insert an "Index Document". Just put in index.html for now and click save.
Continue with the "Permissions" tab. It's above the "Static Website Hosting" tab. Click on "Add bucket policy" and add the following. Replace your-bucket-name with your actual bucket name:
{
  "Version": "2012-10-17",
  "Statement": [
    {
      "Sid": "AllowFromAll",
      "Effect": "Allow",
      "Principal": "*",
      "Action": ["s3:GetObject"],
      "Resource": ["arn:aws:s3:::your-bucket-name/*"]
    }
  ]
}
Don't forget to click on "Save".
Setup your API (upload) user
Now comes the hard part. In order to upload files to your bucket from your application you need to setup access credentials. Those are named "AWS Identity and Access Management" - or short IAM.
Having this said: you could skip the hard part and just use your AWS root credentials. But don't! It's a truly bad idea! So bad, that I even won't tell how to do that.
Create an IAM User
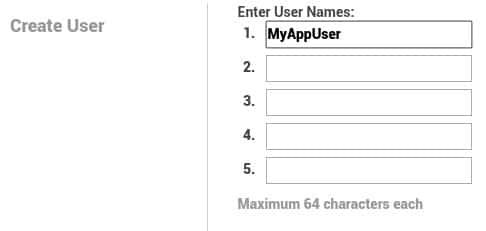
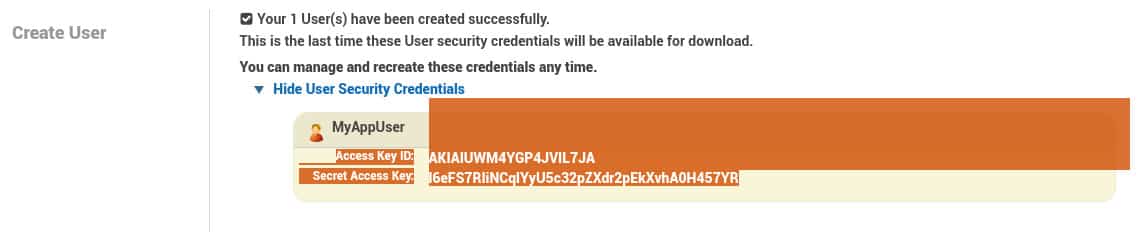
Open the top navigation, find IAM (there is a green key next to it) and proceed to the IAM dashboard. Now click on "Users" in the left navigation and then on the "Create new Users" button. Here you'll get a form in which you can create multiple users at once. Don't bother, just enter a single user name (it's just for you, so you know what is what).
Click on the "Create" button in the right lower corner and STOP! In this next screen, you need to copy the newly created credentials of your user: the "Access Key ID" and the "Secret Access Key". Click on "Show user credentials" then copy & paste them somewhere save. Then you can clock on the "Close button" in the lower right corner.
Halfway done.
Create an IAM Policy
You now have a user with access credentials. However, the user is not allowed to do anything. So you need to create an IAM Policy and assign it to the user.
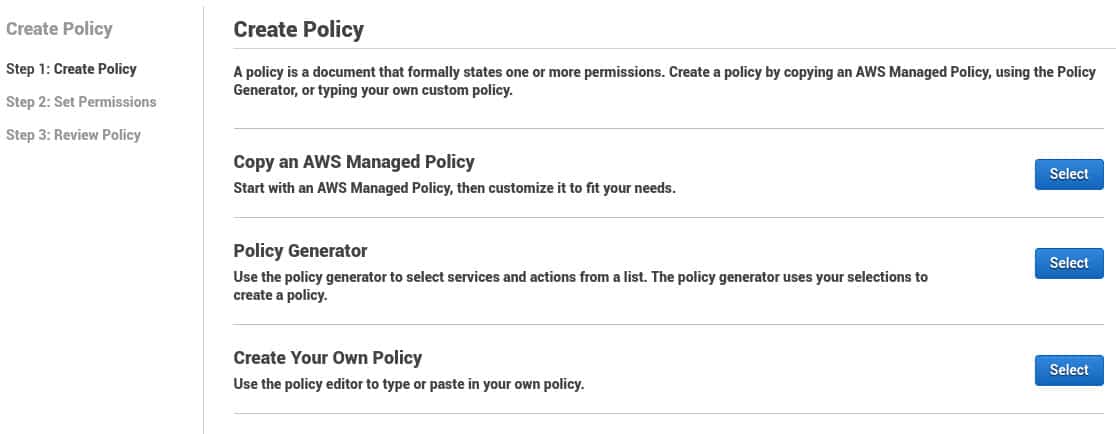
You should be in the IAM dashboard now. Click on "Policies" in the left navigation. On the right, you'll see a bunch of existing policies, with a AWS logo before them. Those are the pre-created policies of Amazon. Ignore them for now and click on the "Create Policy" button. In the next screen choose "Create Your Own Policy".
Now you are in the policy create form. First the easy part:
- Policy Name: I prefer the same name as the user name, eg
MyAppUseror the like. - Description: Well, something descriptive. Strangely enough: it cannot be changed later on.
Now to the Policy Document. Following a complete policy we recommend at the beginning:
{
  "Version": "2012-10-17",
  "Statement": [
    {
      "Sid": "Stmt1440611618416",
      "Action": ["s3:ListAllMyBuckets"],
      "Effect": "Allow",
      "Resource": "arn:aws:s3:::*"
    },
    {
      "Sid": "Stmt1440610197576",
      "Action": "s3:*",
      "Effect": "Allow",
      "Resource": ["arn:aws:s3:::your-bucket-name", "arn:aws:s3:::your-bucket-name/*"]
    }
  ]
}
Let's decrypt that:
- There are two statements (rules).
- The first statement is required so you can list all your buckets. Eg if you'd be using a WordPress plugin, it would probably want to present or list you all available buckets. This statements permits that.
- The second statement grants all possible rights to a specific, named bucket (replace
your-bucket-namewith the name you chose) and everything "under" it. You can (should) later on limit those rights further, but especially in the beginning, a missing permission can lead to much headache!
Attach the Policy to the User
That's the last step. If you have already left the edit mode of the policy then go back there (Service > S3 Policies > Your policy). In the edit mode, find the "Attach" button and click it. You will be presented a list of all your users (and groups). Should be only one user, unless you created some on your own. Choose the above created user ("MyAppUser") and click "Attach policy".
Now you are done!
Accessing the storage
If you are a Mac user, you might want to try Cyberduck or Transmit to access your new bucket for the first time. For Windows users, there is there is S3Browser, CloudBerry and CrossFTP. And Linux users can use CrossFTP as well or CloudExplorer (or various command line tools).
Testing the storage
To give you a short impression on how to use the newly created bucket with S3, here an example on how to upload a file using Flysystem. You want to install league/flysystem-aws-s3-v3 (or league/flysystem-aws-s3-v2), which depends on league/flysystem via Composer. Then the following upload handler will work:
<?php
use Aws\S3\S3Client;
use League\Flysystem\AwsS3v3\AwsS3Adapter;
use League\Flysystem\Filesystem;

include __DIR__. "/vendor/autoload.php";

// setup the S3 adapter
$client = new S3Client([
    'credentials' => [
        'key'    => 'your-iam-user-access-key',
        'secret' => 'your-iam-user-secret-key'
    ],
    'region'  => 'eu-west-1',
    'version' => 'latest',
]);
$adapter    = new AwsS3Adapter($client, "your-bucket-name");
$filesystem = new Filesystem($adapter);

// upload a file
$stream = fopen($_FILES[$uploadname]['tmp_name'], 'r+');
$filesystem->writeStream('uploads/'.$_FILES[$uploadname]['name'], $stream);
fclose($stream);
Of course, if you are using a framework, this will be far more elegant. Checkout these recipes.
Delivering files
Now that's the easy part. With the public URL from above, any file you upload will be available at: http://your-bucket-name.s3-website-eu-west-1.amazonaws.com/the-file/you-uploade.abc.
Custom domains and HTTPS
If you want your files available at a custom domain - or if you need HTTPS - you can use Amazons CloudFront service. To explain how to do that would go beyond the scope of this article. Here are some links, which will get you started: