Frontend testing for Craft CMS
Created

This article is a bit older and might be outdated.
Testing a Craft CMS website might be less difficult than you think. Level up and follow us along as we learn about frontend testing Craft CMS websites.
Why test Craft CMS websites?
Software testing is one of the most important tools in the hands of software developers - it allows us to quickly make modifications in the code, without worrying that some unexpected bugs will be discovered later on. Contrary to common belief, tests are not the domain of complicated applications - in this article, we will show you how you can test Craft CMS templates using Codeception and Cypress.
But why would you need to test Craft CMS templates, even if your website does not have any custom modules or plugin code? As Twig components grow more complicated and are reused in multiple parts of the site, a single change can lead to unforeseen results appearing in other parts of the site. A testing script could visit multiple part of the website, check if a specific piece of content is rendering correctly, and perform common user actions like logging in, sending forms or, if we're talking about a commerce site, adding products to the shopping cart and creating orders. These kinds of tests are usually performed manually by humans, by "clicking-through" the website - but doing that is kinda tedious and there is usually not enough time to test everything manually as often as it should be done. So when we finally find errors in the website, it can be hard to find out what specific change introduced them.
Takeaways from this article
Here, we will describe and compare two different frameworks for testing Craft CMS websites:
- Cypress - E2E tests
- Codeception - acceptance testing
What are acceptance tests and E2E tests? To be honest, these terms are bit murky, and depending who you ask, you might get slightly different answers.
- E2E (end to end) tests are tests performed under real-life scenarios - they test the application as a whole, instead of its isolated components
- Acceptance tests are tests of the application which determine if it meets required specifications - and will be "accepted" by its users
In practice, both Codeception acceptance tests and Cypress E2E tests will do one and the same - render a website, interact with it and check if the expected result occurs.
Spoke & Chain demo site
To show how tests work in practice, we created a fork of the official Craft Commerce demo site, Spoke & Chain. This site already has Cypress tests included - we added some new ones, as well as Codeception tests, so these two frameworks can be compared using the working examples. In this article we will describe:
- Testing a simple search form
- Testing if multiple pages render correctly and without errors
- Testing the Craft Commerce checkout process
'Spoke & Chain' uses Nitro and DDEV configuration, but if you don't want to use it, you can just set up the website the regular way, by installing composer packages and providing database connection data in the .env file. Remember to use seed.sql provided in the repository as your database, so your tests have proper content to use.
Cypress E2E tests
Cypress is a JavaScript-based testing framework that allows us to run E2E tests. It runs its tests in a web browser, which lets us watch them execute in real-time.
Cypress is a commercial offering with monthly pricing starting at $75 at the time of writing. There is also a limited free tier sufficient for basic tasks.
Cypress 10 used in Spoke & Chain E2E tests is supported by Node versions 12 to 16. To install Cypress, just run npm install in the console - the Cypress package is included in the package.json file. Along with it, the project also includes packages responsible for compiling framework assets, although compiled CSS and JS files are already present in the project. One of the packages, webapp-webpack-plugin is compatible only with Node 12 - if you want to install the project using a newer version of Node, you need to remove this package from package.json before installation. Doing so won't stop you from using Cypress tests in any way.
Before you run Cypress, you need to create a cypress.config.js file which will provide configuration and environment variables for our tests. The repository contains cypress.config.example.js which we can rename to cypress.config.js. There we can set a base website URL depending on our server setup or control panel login and password. Craft admin logins are stored in cypress.config.js, you can use the php craft users/create --admin console command to create a new admin user.
Spoke & Chain uses a header menu fixed to the top of the page. This could potentially cause problems with tests, because when Cypress scrolls to an element it wants to interact with, by default it scrolls just far enough for the element to appear on top of the viewport - so this element would get covered by the fixed menu and Cypress would throw an error. This can be avoided by passing {scrollBehavior: 'center'} setting to methods like click(); however not every Cypress method accepts this setting - for example the select() method used for interacting with <select> elements does not. That's why the cypress.config.example.js file has a global setting scrollBehavior: 'nearest' which prevents such errors.
Cypress test code is located in the cypress directory. Here's what it contains:
fixtures- data to use in our tests. With 'Spoke & Chain', we need buyers data to enter when creating a commerce order.e2e- the tests themselves. They are divided by sub-directories,cpor control panel tests andfrontfor frontend tests. Tests we added ourselves are in anewsub-directory.plugins- here we define any external plugins our tests will use.support- in this directory we can define reusable commands used by our tests. For example -addProductToCartwhich will perform all the actions needed to add a product to shopping cart.viewport-sizes.js- browser viewport sizes which will be used in tests.
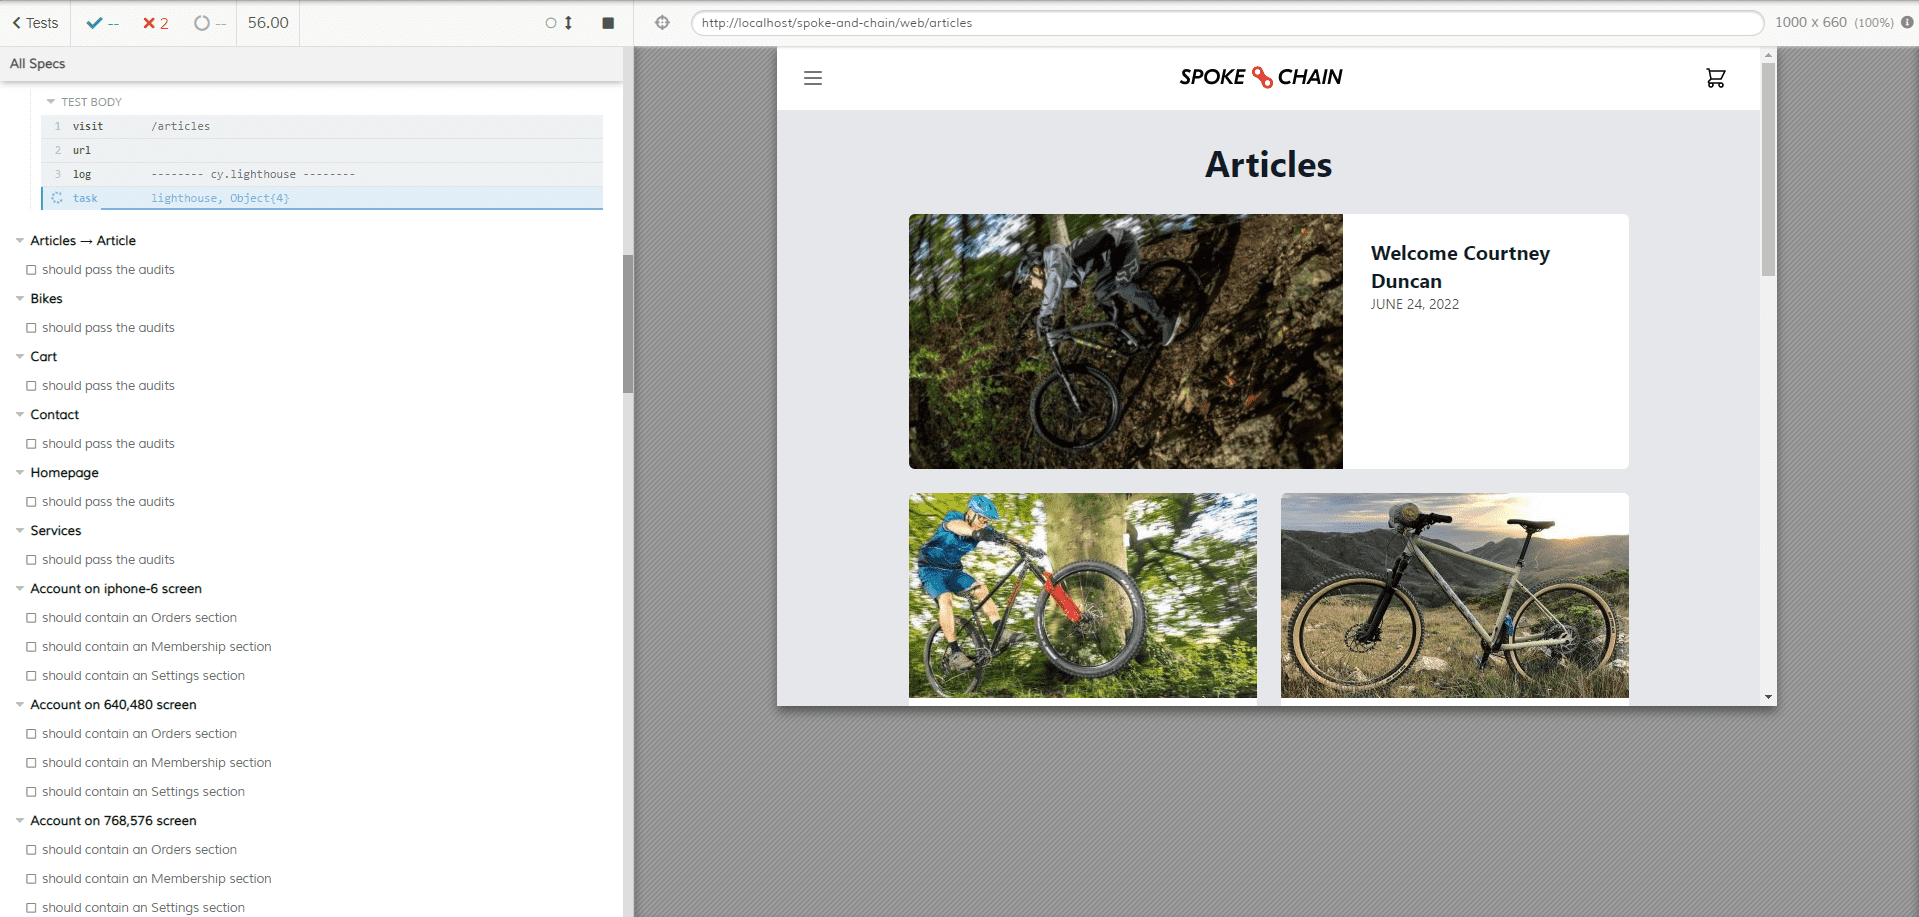
To start Cypress, run npx cypress open and the GUI will appear - from there, you can just click "E2E Testing", select the browser of your choice from the list and click "Start E2E Testing". The browser will open with a list of tests and there you can select a specific test to run and watch it execute.
Simple Cypress example - search form
Take a look at the cypress/e2e/new/searchForm.cy.js file. This test will check a very simple search form which is located in the templates/search-test.twig file. The form contains just an input, a button and the results list - that's what Cypress will interact with. It will enter a search phrase into the input field, click the button to submit the form and check if an entry corresponding to our phrase shows up in the results list. It will also make sure that other entries that do not match the searched phrase are not present in the results.
Here's the Twig code of our search form:
{% set query = craft.app.request.get('searchText') %}
{% set searchResults = craft.entries.search(query).all() %}

<form action="">
    <input id="searchText" name="searchText" value="{{query}}">
    <button id="submit">search</button>
</form>

{% if query is not empty %}
    Results for {{query}}:
    <br>
    {% for item in searchResults %}
        <a class="result-link" href="{{item.url}}">
            {{item.title}}
        </a>
        <br>
    {% endfor %}
{% endif %}
And here's our test:
it('search form should work correctly', function () {
  cy.visit('/search-test');
  cy.get('#searchText').type('Welcome');
  cy.get('#submit').click();
  cy.get('.result-link').contains('Welcome Courtney Duncan');
  cy.get('.result-link').contains('Adventure Journal on the Pine Mountain 2').should('not.exist');
});
As you can see, Cypress uses methods that simulate interaction with the website. visit is used to go to the search form URL (same as the search form filename - thanks to Craft CMS routing), type simulates typing into an input, and click simulates clicking an element.
We also use the get method to select specific DOM elements using a CSS selector - just like it works with regular document.querySelector() or jQuery. Keep in mind that this requires your element to have unique HTML attributes - so if you use a CSS framework like Tailwind that allow you to style the page using universal CSS classes, you still need to attach some unique class, ID or data attribute to elements used in tests.
Finally, we make the most basic assertion using contains to check for the existence of content on the rendered website. That way we determine if test was succesful or not. Cypress supports all kinds of Assertions; documenting them here would go beyond the scope of the article.
Cypress - checking multiple pages for HTTP errors
The most basic form of testing a site is by visiting various pages and checking that nothing broke. It might seem that just manually opening the homepage in a browser would be quicker then setting up these tests. But if we need to test 50 pages (for example if we modified some website component that is used globally), using automated testing begins to show its usefulness.
Our test is located in the cypress/e2e/new/checkPages.cy.js file:
const urls = ['/', '/bikes', '/services', '/articles', '/contact'];

urls.forEach((url) => {
  it('should render correctly', function () {
    cy.visit(url);
  });
});
As you can see, all we do is loop through URIs and use the visit method to request them. But where is the assertion? Well, Cypress will mark a test as failed if the response code of the visited page is anything other than 2xx or 3xx - for example a 500 internal server error or a 404 not found.
Cypress - testing the checkout process
Now it's time for something more complicated: testing the e-commerce checkout process. Contrary to the two basic tests we described before, this one is included with Spoke & Chain demo site by default: you can find it here: cypress\e2e\front\checkout.cy.js.
First, let's take a look at the start of the file. Here, we set up a loop which will run tests for every screen size defined in the viewport-sizes file. We also load the user information fixture from the cypress/fixtures/user.json file and assign it to the user variable so we have some data to use in our tests. Using it we define the name of our test.
const sizes = require('../../viewport-sizes')

sizes.forEach((size) => {
    describe(`Checkout on ${size} screen`, () => {
        beforeEach(() => {
            cy.setViewportSize(size)

            // Define the user fixture
            cy.fixture('user').as('user')
        })

        it('should add a product to the cart and checkout as guest', function () {
Next, our test performs actions which we would do if we tested the checkout manually - visiting URLs, clicking buttons, and typing into forms. This test visits multiple stages of the checkout process, but we don't need to specify their URLs - just submitting forms will redirect us to the proper pages.
Note how we use this.user.email and other variables with the type method - it's the data taken from the fixture.
// Add a product to the cart
cy.visit('/product/san-quentin-24');

cy.get('#buy button[type=submit]').click();

// Navigate to the cart
cy.get('button.cart-toggle').click();

cy.get('div.cart-menu a.button.submit').contains('Check Out').click();

// Checkout as guest
cy.get('#guest-checkout button[type=submit]').contains('Continue as Guest');

cy.get('#guest-checkout input[type=text]').type(this.user.email);

cy.get('#guest-checkout button[type=submit]').click();

// Shipping address
cy.get('form#checkout-address input[name="shippingAddress[firstName]"]').type(this.user.address.firstName);
cy.get('form#checkout-address input[name="shippingAddress[lastName]"]').type(this.user.address.lastName);
cy.get('form#checkout-address input[name="shippingAddress[addressLine1]"]').type(this.user.address.addressLine1);
cy.get('form#checkout-address input[name="shippingAddress[locality]"]').type(this.user.address.locality);
cy.get('form#checkout-address input[name="shippingAddress[postalCode]"]').type(this.user.address.postalCode);
cy.get('form#checkout-address select[name="shippingAddress[countryCode]"]').select(this.user.address.countryCode);
cy.get('form#checkout-address button[type=submit]').click();

// Use the default shipping method
cy.get('form#checkout-shipping-method input[type=radio][value="freeShipping"]').click();

cy.get('form#checkout-shipping-method button[type=submit]').click();

// Fill credit card details and pay
cy.get('form#checkout-payment input[name="paymentForm[dummy][firstName]"]').type(this.user.card.firstName);
cy.get('form#checkout-payment input[name="paymentForm[dummy][lastName]"]').type(this.user.card.lastName);
cy.get('form#checkout-payment input[name="paymentForm[dummy][number]"]').type(this.user.card.number);
cy.get('form#checkout-payment input[name="paymentForm[dummy][expiry]"]').type(this.user.card.expiry);
cy.get('form#checkout-payment input[name="paymentForm[dummy][cvv]"]').type(this.user.card.cvv);
cy.get('form#checkout-payment button[type=submit]').click();
Finally, we just check if the page we end up on after submitting the checkout form displays a success message, using the contains method.
cy.get('h1').contains('Success');
Codeception acceptance testing
Codeception is a standard PHP testing framework that has a Craft CMS integration. It is most commonly used for unit testing Craft plugins. We can also set it up for testing the website's frontend with acceptance tests.
Codeception is free to use without limits. Enterprise support is available.
By default, Codeception acceptance tests are run in headless mode using the PhpBrowser. Under the hood it uses Guzzle and Symfony BrowserKit to perform HTTP requests and to parse HTML. If you rely on JavaScript execution during your tests use the WebDriver. The long version, including pro and cons, and a setup guide is documented here.
One advantage that Codeception has over Cypress is that it is much more tightly coupled with Craft CMS. For Cypress, only HTML code matters. With Codeception, we can are in control of the CMS data for our tests. We can assure that our main database will not be flooded with test-related data by using a different database. Fixtures (see the Craft CMS docs) allow us to create a predictable dataset for different test scenarios. Please bear in mind, fixtures in Codeception are very different than the ones in Cypress.
The Craft CMS documentation has instructions for setting up Codeception tests. Using them, we added Codeception to the Spoke & Chain project - with just a few modifications.
- We changed the
dbSetupsetting incodeception.ymlso that the database is not reset each time a single test runs. Although Codeception acceptance tests do not reset the database (only unit tests do), we still felt it's better to disable this feature to prevent any accidental data loss. - We added an
outputsetting tocodeception.yml- there you can find the HTML output of failed acceptance tests. - We installed additional composer packages
codeception/module-phpbrowserandcodeception/module-yii2used in our tests. - We added proper configuration to the
tests/acceptance.suite.ymlfile for our acceptance tests, and generated anAcceptanceTesterclass using the./vendor/bin/codecept buildcommand. Note that ourcodeception.ymlconfig file uses a environment variable containing the website base URLPRIMARY_SITE_URL- taken from thetests/.envfile.
actor: AcceptanceTester
modules:
  enabled:
    - PhpBrowser:
        url: '%PRIMARY_SITE_URL%'
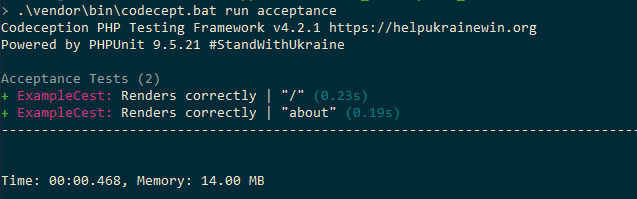
Codeception tests use their own .env file, but if you want them to use the same database as the regular site, you can just copy the .env file into the tests directory. To run acceptance tests, use the command ./vendor/bin/codecept run acceptance. You can also run specific tests with ./vendor/bin/codecept run acceptance testClass, where testClass represents a specific test class.
Now, let's recreate all the previously described Cypress tests in Codeception.
Simple Codeception example - search form
Just as with the Cypress tests, Codeception acceptance tests have methods for interacting with the website - we can click buttons, submit forms and check for the contents of rendered HTML elements. This can be used to check if forms such as the search form work correctly. Here's the tests/acceptance/SearchFormCest.php file. Note that every testing class name needs to end with "Cest".
<?php

namespace crafttests\acceptance;

use Craft;
use AcceptanceTester;

class SearchFormCest
{
    public function testSearch(AcceptanceTester $I)
    {
        $I->amOnPage('/search-test');
        $I->fillField('#searchText', 'Welcome');
        $I->click('#submit');
        $I->see('Welcome Courtney Duncan', '.result-link');
        $I->dontSee('Adventure Journal on the Pine Mountain 2', '.result-link');
    }
}
Unlike with Cypress, here we don't use a separate get method for grabbing DOM elements, but just pass element selectors as second parameter. The click method tries to locate an element by its text, name, CSS or XPath.
Codeception - checking multiple pages for errors
Now, let's perform our "visiting various pages and checking if nothing broke" test.
Here's the test class which will visit the homepage (the page with a / URI) and check if any errors show up. If something goes wrong, we will get a response code other than 200 - for example 500 or maybe 404, which will make test fail due to the seeResponseCodeIs(200) assertion.
<?php

namespace crafttests\acceptance;

use Craft;
use AcceptanceTester;

class CheckPagesCest
{
    public function rendersCorrectly(AcceptanceTester $I)
    {
        $I->amOnPage('/');
        $I->seeResponseCodeIs(200);
    }
}
Shouldn't we test more than one page though? So, how do we test multiple pages - do we set up separate method for each one? That would lead to tons of code duplication, so we will use data provider annottions instead. Here's the final version of our test class, located in the tests/acceptance/CheckPagesCest.php file.
<?php

namespace crafttests\acceptance;

use Craft;
use AcceptanceTester;

class CheckPagesCest
{
   /**
    * @dataProvider urlsProvider
    */
    public function rendersCorrectly(AcceptanceTester $I, \Codeception\Example $singleUrl)
    {
        $I->amOnPage($singleUrl['url']);
        $I->seeResponseCodeIs(200);
    }

    protected function urlsProvider()
    {
        return [
            ['url' => '/'],
            ['url' => '/bikes'],
            ['url' => '/services'],
            ['url' => '/articles'],
            ['url' => '/contact'],
        ];
    }
}
Data from the urlsProvider method will be used to dynamically generate multiple tests, using the rendersCorrectly method as a template. Note the annotation in the phpdoc block to attach a data testing method. So if you have the habit of removing code comments, your test might stop working.
Codeception - testing the checkout process
Here's the Spoke & Chain checkout test recreated in Codeception - located in the tests/acceptance/CheckoutCest.php file.
Instead of using Codeception fixtures (which are most often used in unit tests), we used data provider annotation to store example buyer data. Please note the submitForm method - it takes an array of form values, where the array key is the input's name attribute. This slightly simplifies our test compared to the Cypress one. Other than that - this test works exactly the same as the Cypress version, except it does not check the website in multiple screen resolutions.
<?php

namespace crafttests\acceptance;

use Craft;
use AcceptanceTester;

class CheckoutCest
{
   /**
    * @dataProvider userProvider
    */
    public function testCheckout(AcceptanceTester $I, \Codeception\Example $singleUser)
    {
        // Add a product to the cart
        $I->amOnPage('product/san-quentin-24');
        $I->click('#buy button[type=submit]');

        // Navigate to the cart
        $I->click('button.cart-toggle');
        $I->see('Check Out', 'div.cart-menu a.button.submit');
        $I->click('div.cart-menu a.button.submit');

        // Checkout as guest
        $I->see('Continue as Guest', '#guest-checkout button[type=submit]');
        $I->fillField('#guest-checkout input[type=text]', $singleUser['email']);
        $I->click('#guest-checkout button[type=submit]');

        $I->submitForm('form#checkout-address', array('shippingAddress' => array(
             'firstName' => $singleUser['firstName'],
             'lastName' => $singleUser['lastName'],
             'addressLine1' => $singleUser['addressLine1'],
             'locality' => $singleUser['locality'],
             'postalCode' => $singleUser['postalCode'],
             'countryCode' => $singleUser['countryCode'],
        )));
        $I->amOnPage('/checkout/shipping');

        // Use the default shipping method
        $I->click('form#checkout-shipping-method input[type=radio][value="freeShipping"]');
        $I->click('form#checkout-shipping-method button[type=submit]');

        // Fill credit card details and pay
        $I->submitForm('form#checkout-payment', array('paymentForm' => array(
            'dummy' => array(
                'firstName' => $singleUser['firstName'],
                'lastName' => $singleUser['lastName'],
                'number' => $singleUser['cardNumber'],
                'expiry' => $singleUser['cardExpiry'],
                'cvv' => $singleUser['cardCvv'],
            )
        )));

        // success
        $I->see('Success', 'h1');
    }

    protected function userProvider()
    {
        return [
            [
                'email' => 'ben@craftcms.com',
                'firstName' => 'Ben',
                'lastName' => 'David',
                'addressLine1' => '13 rue des Papillons',
                'locality' => 'Grenoble',
                'postalCode' => '38000',
                'countryCode' => 'FR',
                'cardNumber' => '4242424242424242',
                'cardExpiry' => '03/2026',
                'cardCvv' => '123',
            ],
        ];
    }
}
Summary
Both Cypress and Codeception have their pros and cons. There is also the matter of which language you are more comfortable with - PHP or JS. Ultimately, it's up to you which one to choose:
- Codeception is tightly coupled with Craft CMS, allows setting up a separate database for testing, is quick and works well in text environments. However by default it does not run JS scripts, which prevents it from testing the Craft CMS control panel.
- Cypress is more frontend-oriented, allows running tests in the browser by default and testing multiple breakpoints of a website. While tests run, you can also observe them and pick up any CSS bugs which would not be automatically detected.
We hope our article gets you on board with frontend testing and that you will make testing part of your regular development process. As we demonstrated, it is nothing to be afraid of - it can be easily set up and save you time in daily developer work. So go ahead, clone our Spoke & Chain fork and see how it works in practice.
Related Craft CMS reading
- Testing Craft CMS sites with Pest — unit-level testing alternative.
- Things to know about fast Craft CMS websites — performance tuning across the stack.
- Opinionated Craft CMS 4 upgrade guide — tests are your safety net during a major upgrade.
This article is cross-published at the website of the author.